How To Ride A Unicycle: Our Guide
The journey to becoming a pro at riding a unicycle can be rewarding yet tough, but with this guide you can make the trip easier and swifter. It takes roughly 15 to 20 hours to learn unicycling which should roughly take no more than an hour and a half per day for 2 weeks. Falling will be a natural part of the process so a mindset of being prepared to fall down and try again will go a long way. With this mindset along with this guide you’ll soon be on your way to mastering unicycling.
Preparing To Ride A Unicycle
1. Safety Gear
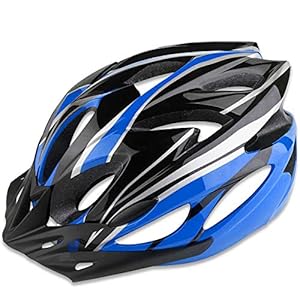
Although unicycling is not a dangerous activity, it is important to be prepared since it’s normal to fall off every now and then, especially in the beginning. Wearing a helmet, wrist guards, shin / knee pads, running shoes and trousers will therefore be highly useful. You should also avoid wearing loose clothing. Your body will thank you for taking these precautions in the long run.
2. Find An Area To Practice
The best location for practicing unicycling is an area with smooth and flat flooring. You should avoid grass or rough, uneven ground that has pebbles or anything that could trip you. To make the learning process as easy as possible you should aim for even flooring.
The ideal location would therefore be a long, smooth and narrow corridor with railing or a wall by the side that you can hold on to when starting out. A tennis court, gym or any indoor area with concrete flooring may also be useful. If these areas have a fence to hold on to that can also help.
If you can’t find a narrow corridor, railing or fence to hold on to while practicing though, you can instead place two chairs slightly apart with their backs facing each other in a wide open space with smooth flooring and use the chairs to hold on to at first. Alternatively, you can also ask a friend or two to help you when you first start practicing. If you use this option, your friends should be slightly ahead of you and cannot carry your weight.
3. Setting Up Your Unicycle
First, you need to make sure your unicycle is the right way around. The broader section of the saddle should be at the back and the frame, pedal and crank should be marked “L” and “R.” You should check if the pedal inscribed “L” is on your left side and if the one marked “R” is on your right side.
Next, you need to consider the height of the seat. This step is vital as if your seat is not the right height it will make the learning process more difficult. The height of the seat allows you to maintain the correct posture when riding. This posture is when you’re sitting on the unicycle and one foot is on the pedal in the lowest position with your leg being almost straight. If you can not maintain this posture your unicycle is at the wrong height.
As a general guide you can also put your thumb in your belly button and check if the top of your saddle is 2 – 3 centimeters lower.
4. Mounting Your Unicycle: Assisted
When you first learn how to mount your unicycle you should stand near a wall, railing, your chairs or your friend. With your legs wide apart and feet flat against the ground you want to grab the seat of the unicycle and place it between your legs. Once you have done this you should make sure that one of your pedals is in the 4 O’Clock position and with your nearest foot, step on to this pedal. Afterwards you should stand on this pedal with most of your weight and as the unicycle begins moving you should attempt to get on the unicycle by placing your other foot on the other pedal while holding the wall, railing or support. Following these steps, you should now be seated on your unicycle. From here you can pedal backwards slightly so that your feet are horizontal on the pedals.
After this you can now begin going forward.
5. Balance
Being able to stay balanced is a crucial step.
Before you start peddling there are some tips you should keep in mind.
Leaning forwards slightly rather than backwards is an important aspect of being able to stay balanced. Additionally, if you feel like you are going to fall, as long as you are leaning forwards, you will fall forwards and land safely on your two feet standing. If you ride while leaning backwards however, you will likely fall painfully on your back. You should therefore ensure you are leaning forwards slightly while riding.
Another tip to keep in mind is that you should sit up straight but relaxed, without being too stiff and keep your body weight on the seat instead of the pedals. Overly shifting your weight to the pedals and your legs will cause the unicycle to be less steady and more unbalanced when riding.
Some other tips include looking ahead while riding instead of downwards. This might be difficult at first, but you need to look forward to know where you’re going. If you look downwards you will increase the likelihood of you falling off your unicycle. Looking ahead also helps put your body in the correct riding position.
Now that you have these tips in mind, once you are mounted on your unicycle you should stay in that position for a while and let your unicycle move a bit under you to get a better sense of balance.
6. Your First Steps
With the previous tips in mind, you can hold on to the wall, rails or your support, lean forward a bit and begin pedaling. You can do this at a slow pace and pause when your feet are at the same level again so that you can check if your posture is correct and that you are distributing your body weight on the seat and not your pedals and legs. Between these pauses make sure to keep pedaling forward, one foot in front of the other as if you are learning to walk.
As you go by and your confidence begins to build you can try holding the wall, rails or your support less and only hold on to it when needed, such as if you’re struggling with your balance.
7. Riding Your Unicycle
When you feel that you are more confident, you can start doing the previous steps at a faster speed. The riding speed of a unicycle is around the same pace as speed walking, so you want to try riding at this pace and only hold on to your support when needed.
You can also start practicing turning on your unicycle now. To turn on your unicycle all you need to do is move your hips, the upper region of your body, and your arms in the direction you want to turn towards. While practicing near the wall or your support you can try steering away from the wall. At first, this will cause you to turn in a large full circle, but the more you practice, the more nuanced your steering will become. Try steering away from the wall at a slow pace and only use your support for balance when necessary.
Now You’re An Expert
After your confidence has grown more, you can try practicing riding your unicycle away from the wall or your support. When you first start riding without support it might be difficult to ride far distances, so you can try making goals. Your first goal could be to ride successfully to the nearest bench, and as your skill grows you can set larger goals until you are able to ride long distances freely.
After going through this guide and putting it into action you should be able to successfully ride a unicycle within 2 weeks. Although you may experience some mishaps at first, over time you will reap the rewards of your effort and become a skilled unicyclist.


